A Step-By-Step Guide to Mastering Gutenberg Blocks
- Content Marketing
- Web Design

So you want to build a website, but your one online course in HTML isn’t going to cut it. What do you do? The answer is Gutenberg blocks. Today we’re going to cover everything you need to know about the WordPress block editor—what it is, how to use it, and our top design tips (from people who’ve actually done it before).
Skip To The Good Stuff
If you’re short on time, you can jump ahead to download our free cheat sheet.
What Are Gutenberg Blocks?
Gutenberg blocks are pieces of content that you can use to build a webpage. WordPress comes with default block options that are the foundation for all the pages of your site. They include elements like:
- Heading
- Paragraph
- Image
- Video
- List
- Column
- Gallery
- File
- And more
By mixing and matching these blocks, you can build custom pages for your website without any developer or coding experience. And for even more specialization, you can install plugins with advanced block options.
Gutenberg Block Benefits
These Gutenberg block benefits make this editor a top choice for designing your website.
- No design or development experience needed. This editor makes creating professional websites accessible to everyone, regardless of your skill level.
- Saves time in content creation. The easy-to-use interface allows you to quickly drop elements onto a page, saving you time in design.
- You can see the design as you go. Because it’s a visual editor, you can see what the page looks like as you build it and adjust accordingly.
- Access to reusable block templates. Have a layout you like? You can create a template and reuse those blocks over and over.
- Looks good on any screen size. The Gutenberg block editor can adjust to any device, whether you’re on desktop, mobile, or tablet.
- Less dependent on plugins and HTML. With Gutenberg blocks, you don’t need to rely as heavily on WordPress plugins or custom code.
- Flexibility in design. The drag-and-drop elements make it simple to customize every page for flexible design options.
- Developer-friendly choice. Developers can create custom Gutenberg blocks for your website’s specific needs.

Are you ready to upgrade your website to the Gutenberg block editor? Reach out to our team for a little help.
Gutenberg Editor Tutorial
We recommend WordPress for all of our clients, and since Gutenberg is the default editor, knowing how to use it is essential.
Gutenberg’s drag-and-drop interface makes it perfect for someone with limited technical experience. And it’s easy to use because its “what you see is what you get” (WYSIWYG) editors look similar to the final product, so you don’t have to guess what the page looks like as you’re building.
You can also choose pre-made patterns from WordPress that help you organize the blocks in a visually appealing way, so all you have to do is customize them to your brand. Lastly, you can install plugins to get access to more advanced blocks like pop-up windows, testimonials, and more.
New to WordPress blocks? Here’s our quick and simple Gutenberg editor tutorial.
Step 1: Add Your Blocks
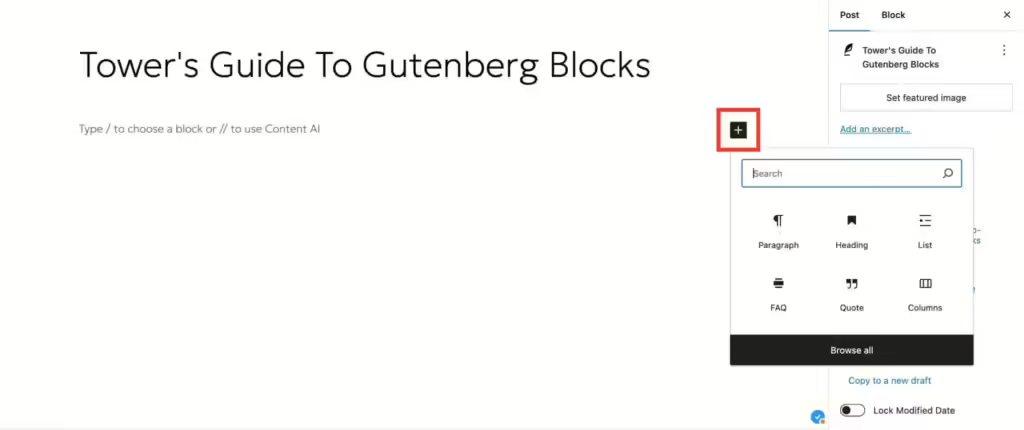
When you’re creating a page using the Gutenberg editor, always start by giving it a title. Then you can begin by clicking on the + button on the right-hand side. This will open a menu where you can choose from over 50 different elements. The paragraph block is the default option, since that makes up the majority of copy on every page.
Tower tip: want a shortcut for adding blocks? Just type “/” followed by the block name and press return. For example, you can add a heading by writing “/heading” and hitting enter.
The most popular elements are organized into six Gutenberg block types.
Step 2: Customize Your Blocks
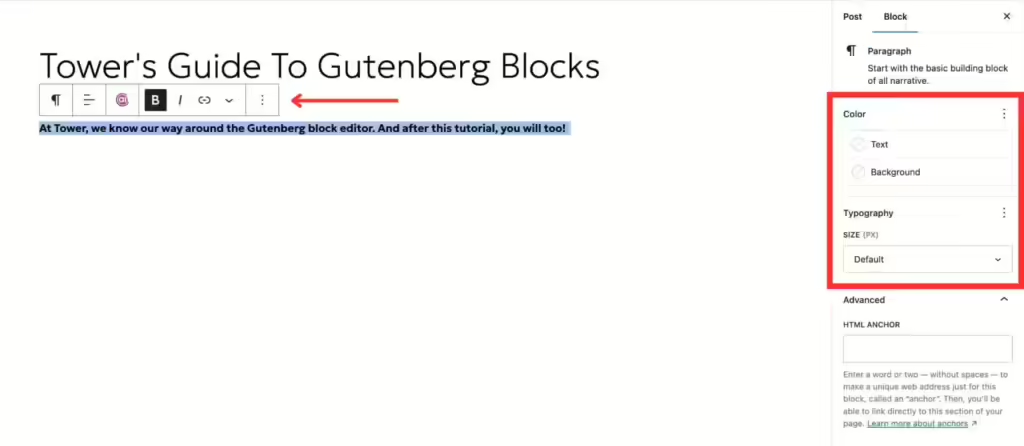
Every block has its own unique editing options, and any changes you make will appear on the left-hand side instantly. That’s WYSIWYG in action.
Let’s start with the most common block—text. You can adjust the style using the options that float above your text or the sidebar on the right. Just like in a Word or Google doc, you can make your text bold, italic, underlined, or hyperlinked. In the sidebar, you can adjust the text and background color, or add an HTML anchor to create jump links.
Now, let’s add an image.
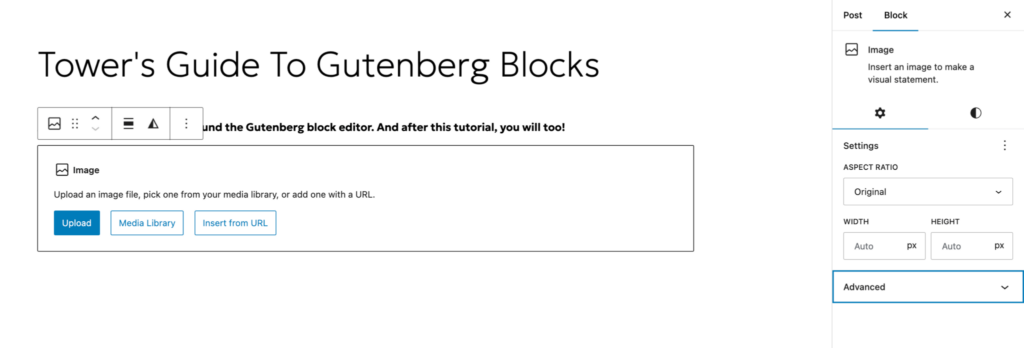
You can upload a photo from your computer, or choose one from the media library. It will automatically insert at full size, but you can adjust how big you want it to display. From there, you can also crop the image, apply filters, write alt text, change the alignment, and even add a caption.
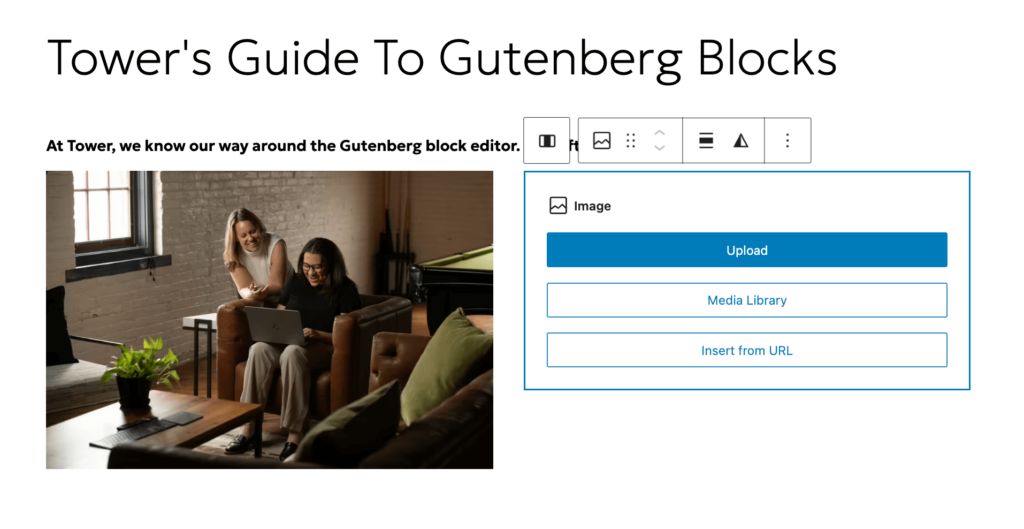
But what if you want to add two different photos next to each other? That’s where columns come in. Just pick your column layout, add image blocks to each section, and voilà!

But that’s not all. There are some advanced Gutenberg blocks that would be helpful to know. Let’s add a call-to-action button at the bottom of your page. To start, just type “/button” and hit enter. From there, you can fill in the button text, add your link, and adjust the size, alignment, and style.
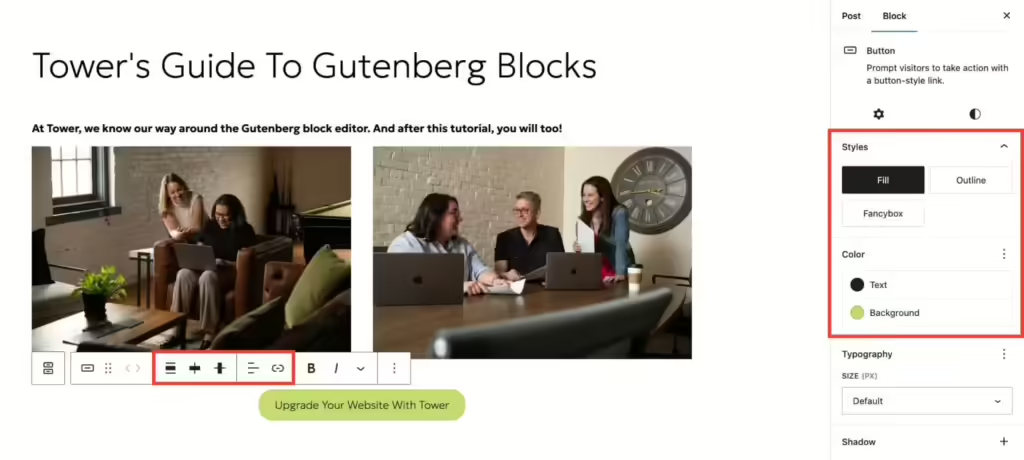
With text, image, column, and button blocks under your belt, you have all the tools necessary to create engaging web pages. And with the countless customization options available, you can easily craft content that’s cutting-edge and on-brand.
Tower tip: Copy and paste entire blocks into a post, so you don’t have to insert and customize them every time.
Step 3: Adjust The Layout
The last step in our Gutenberg editor tutorial is finalizing the details. You can easily change the order of your blocks by dragging them with the six dots, or utilizing the up and down arrows. You can also remove blocks by clicking on the three dots and selecting “delete” at the bottom of the list. Or just hit the delete key!

There are so many ways to get creative with the Gutenberg blocks layout. Use Stack to arrange items on top of each other, and use Row to align them side-by-side. For a little more white space, just add Spacer anywhere on the page and let your content breathe. You can also use the Quote block to make text stand out.
Tower tip: Test out all the available blocks before you start laying out your first page. This way, you know all the options available to you.
When you’re ready to publish, look to the right-hand sidebar. There you’ll see details for the page itself. Update items like:
- Author
- Featured image
- Category
- Tags
And before you hit publish, always preview your work to make sure everything looks good to go.
Gutenberg Design Tips
Now that you have a feel for the available blocks and how to add them, it’s time to dive into our top Gutenberg design tips to make building your site a breeze.
- Lock blocks. For sections that you are done editing, you can lock them in place so they cannot be changed.
- Create reusable block patterns. If there’s a layout you want to use throughout your site to maintain consistency, you can add it as a synced pattern. For example, you can design a call to action banner and add it to any page with the click of a button. Here’s how to do it:
- Select all blocks you want to include
- Click the three dots
- Select “Create Pattern”
- Give it a name and add it to your site
- Reuse it on other pages*
*NOTE: any edits you make to the pattern will show up on all pages where it’s present.
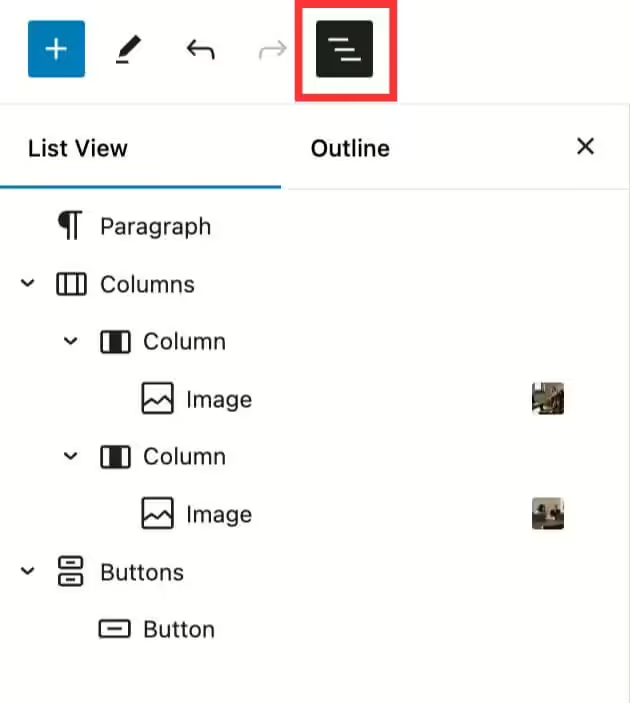
- Utilize the “Outline” tab. In the top left corner, you will see three stacked lines. This opens a small tab that shows you the layout of your entire page. Click on each section to jump to that block in the editor.
- Group blocks together. Sometimes it’s easier to move and edit items as a unit. Select all relevant blocks, hit the three dots, and choose “group.”
- Install plugins for advanced block options. If there’s a specific block your website needs, there are dozens of plugins out there to fill the gap.
- Rely on the WordPress community to solve common problems. If you’re facing an issue with the Gutenberg block editor, you’re not alone. There is a whole community of developers that share their insights to provide solutions to users like you.
Struggling to keep all these tips straight? Download our free Gutenberg blocks cheat sheet to use as a reference in your next web project.
 By April
  Tim
Tim  Kelly H